The process of DIY art might be a very rewarding one. You can be an experienced artist or a complete amateur, but by depicting art with your own hands, one can express himself, be creative. With the help of this guide, you will receive a step-by-step method of creating your own DIY art projects and make sure that you are equipped with the knowledge and inspiration to jump into the world of creativity.
Why DIY Art?
We will enter the details of launching your projects in a moment, but first, it is worthwhile to gain an insight into why DIY art is so attractive:
Availability: DIY art gives you an opportunity to communicate your ideas, emotions, and character in your works.
Affordable: Artistic methods can be affordable when performing at home, particularly when one uses cheap supplies or can use recycled materials.
Therapeutic Benefits: Creative work was found to alleviate stress levels and enhance mental health.
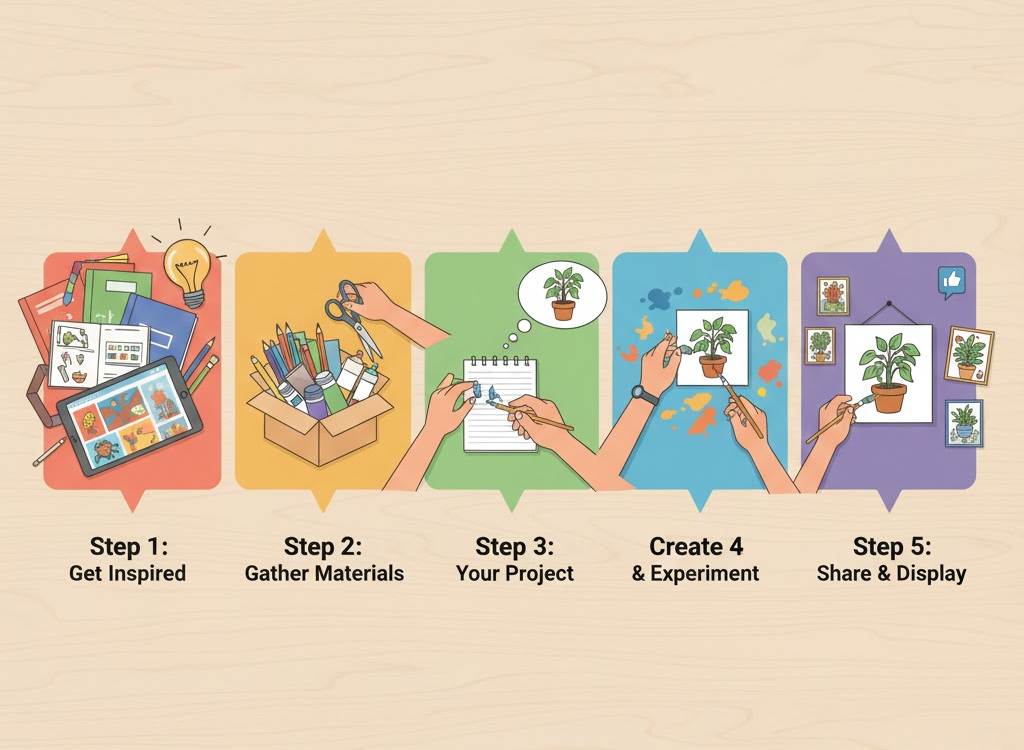
Step 1: Gather Your Supplies
The most important thing in DIY art projects is to assemble supplies. Your supply list can be different depending on the kind of art you would like to create. The following are some of the simple supplies you may think of:
Papers and Canvases: The base should be sketch pad, watercolor paper or canvases.
Paints: It can be acrylics, watercolor, or oils according to your choice.
Brushes: You will have a range of brush sizes that will enable you to get various effects.
Drawing Utensils: Pencil, charcoal or markers to draw with.
Adhesives: Glue, tape or Mod Podge to collage.
Miscellaneous: Scissors, stencils and any decorative material, such as fabric and stickers or natural items.
Tip: Start Small
When you are new to DIY art, it is better to have simple projects that need only a small number of supplies. This will enable you to experiment without being overwhelmed.
Step 2: Find Inspiration
There are different sources of inspiration. Here are some of the methods of taking the lead:
Art Blogs and Websites: Check out websites such as Pinterest, Instagram or art-centered blogs to get some ideas or tutorials.
Nature: Go out in the world and notice the colors, shapes and textures of the world around you.
Art History: Learn about well-known painters and their methods; you will be able to discover a style that you like.
Personal Experiences: Think about your personal experiences, feelings and memories to help you create.
Step 3: Choose Your Project
The choice of the type of project one would do can be thrilling but daunting. The following are some of the DIY art projects:
Canvas Painting: This is a themed painting done with acrylics or watercolors.
Collage Art: Cut out magazine pictures, photographs and various other materials and glue to create a mixed-media work.
DIY Greeting Cards: Choose your own greetings cards to design and use on different occasions with the combination of drawing and collage.
Nature Art: Choose leaves, flowers or rocks and make a work of art using nature as the inspiration.
Upcycled Art: Reuse used objects such as bottles or cardboard into a piece of art.
Tip: Keep It Fun
Select the projects that you are passionate about. This is to have fun in the process and not only the end product!
Step 4: Plan Your Process
The creative process can be made easier with planning your project. Here’s how to approach it:
Sketch Your Ideas: Check out your ideas first on paper. This assists in imagining your project and making changes that are required.
Find Reference Images: In case you are inspired by a certain style or technique, find images that may be used as a reference.
Establish a Timeframe: Determine the time you are willing to give to your project. This will be able to keep you motivated and tracked.
Step 5: Create Your Art
It is time to have some fun–it is time to make your artwork! To the successful experience follow the following pieces of advice:
Break it Down: In case of painting, one should work with large strokes and background colors first and add a detail in the end.
Layering Techniques: There is no harm in the layering of your materials. Take as an illustration, in a collage, layer on layers of paper.
Beauty In Its Flaws: It is important to keep in mind that art is subjective. You must learn to make mistakes and have fun.
Tip: Take Breaks
When you become impatient or confused, have a rest. Making a break can be very helpful in offering fresh ideas or thoughts.
Step 6: Final Touches and Presentation
After you have finished your art, think about the way you would like to present it:
Framing: In the case of a canvas, one can take it without a frame or place a plain frame to highlight the art work.
Show: Choose a unique place in your house where you can present your work. This helps not only to enhance your confidence but also to make your space personal.
Step 7: Share Your Work
It can be as satisfying as making your art, which is why it is good to share. Here are some ways to do so:
Social Media: Share your art on social networks such as Instagram or Facebook to share with other artists and fans.
Art Communities: Members can participate in local art communities or on-line forums where they can post their work and receive feedback.
Personal Blog: Another tool to consider is that of having a blog where you write about your experience in art and showcase your projects.
Tip: Engage with Others
Mingling with other artists may be supportive, motivating and give fresh ideas. You should not be afraid of getting feedback or project work!
Conclusion
The experience of having a DIY art project is a pleasant one to do and should be done to exercise creativity and express yourself. Being an artist means a wonderful and satisfying process; you can start your process by taking these steps: collecting materials, getting inspiration, selecting the project, and sharing your creative work. The main thing to do is to enjoy the act of creating and the happiness of such a personal expression.
FAQs
1. Which materials do I need in order to begin DIY art projects?
Basic supplies can be paper, paints, brushes, scissors and adhesives. You should always start with what you possess and build on it as you venture into new ventures.
2. What can I use to be inspired to undertake my DIY art projects?
Sources of inspiration include nature, art blogs, personal experience and art history. Get creative through the search for alternative resources.
3. Can I sell my DIY art projects?
Yes! A lot of artists sell their DIY projects online on websites such as Etsy or on their local art fairs. All you need to have is the correct marketing strategy.